The theme for this time is the classic for Japanese get-together, “Beer”.
But it’s not a blog that just informs you about beers.
It’s a blog of myself making my original beer because my love for the beer was too strong. Also, I thought why not use some Kyoto ingredients to brew while I’m at it.
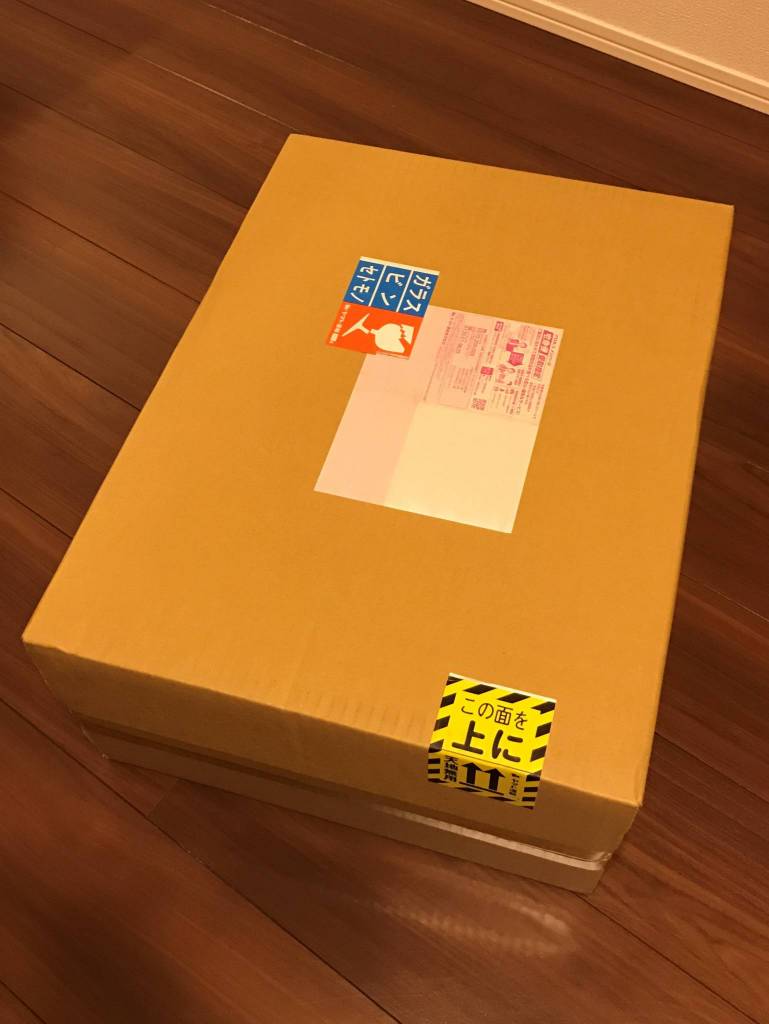
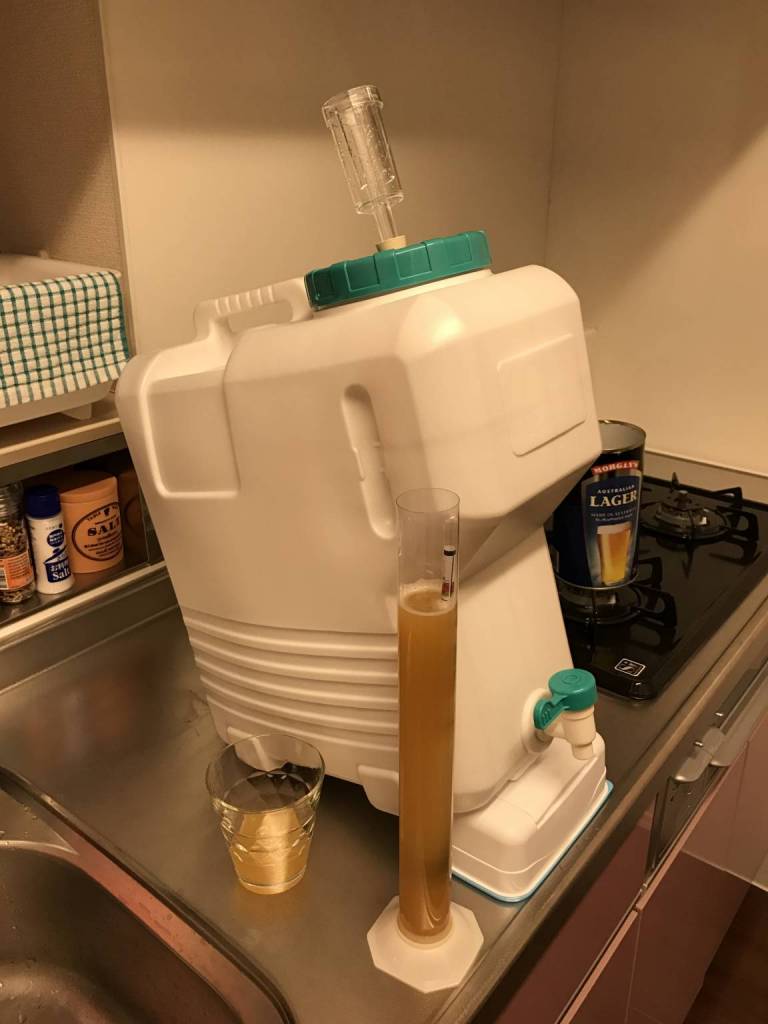
Home brewing beer kit
The kit I used was in the box below.
Bought from Brew Land (Japanese Company).
So I opened the package and pulled out what was in the tank…

This is it.
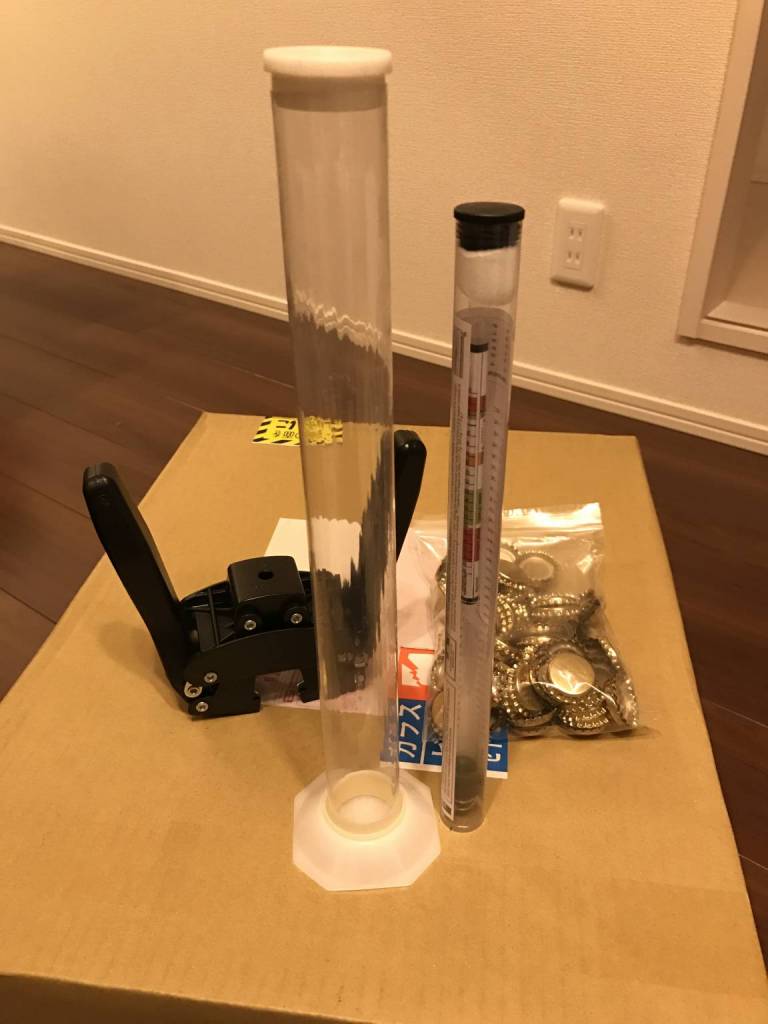
It even has a capping machine and a hydrometer.
* Hydrometer – an instrument for measuring the density of liquids.
Beer brewing incurs chemical reaction, so the liquid component before brewing and after brewing is going to be different, as well as the density.
This is the beer mix
All right, let’s keep going.
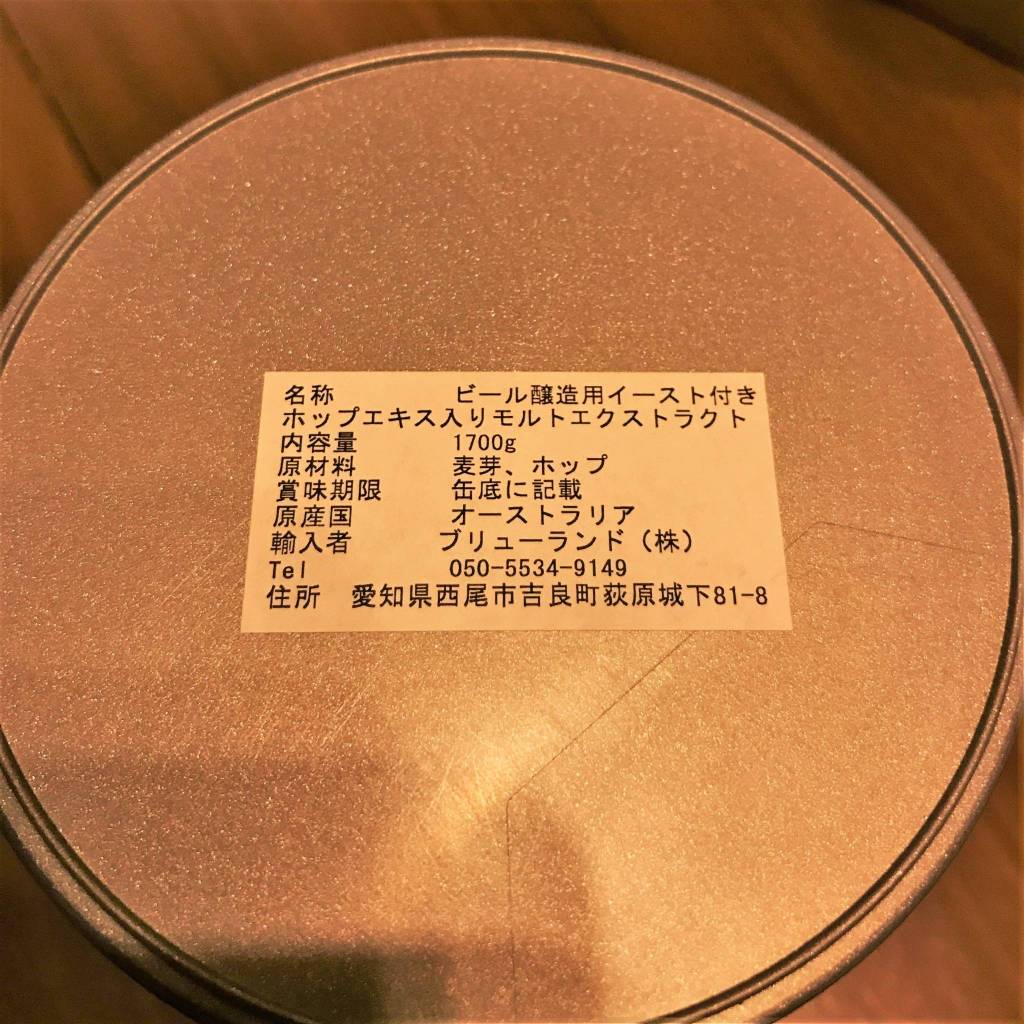
Next one is this. It’s a heavy can weighing 1.7kg with a picture of beer on the label.
So to speak, this is the beer mix.
By the way, do you know the ingredients of a beer?
If you raise an example of the beer-loving country Germany, the ingredients criteria that they must follow for it to be called “draft beer” is
“Wheat”, “Hop”, and “Water”
are the ONLY ingredients they are allowed to use.
Yep, the ingredients of a beer are very simple.
It only has wheat and hop.
All you need do now is to add water and yeast for fermenting, and you can make your own beer.
Inside this beer mix, there’s already a dry yeast included, so all you need is water.
Even water, all it takes is a twist of a tap and you can use as much as you want. lol
Like this, beer is very easy to make.
Here comes the Miso paste!
It’s not fun if it is this easy. I wanted to add one extra step into it.
Have a look below.
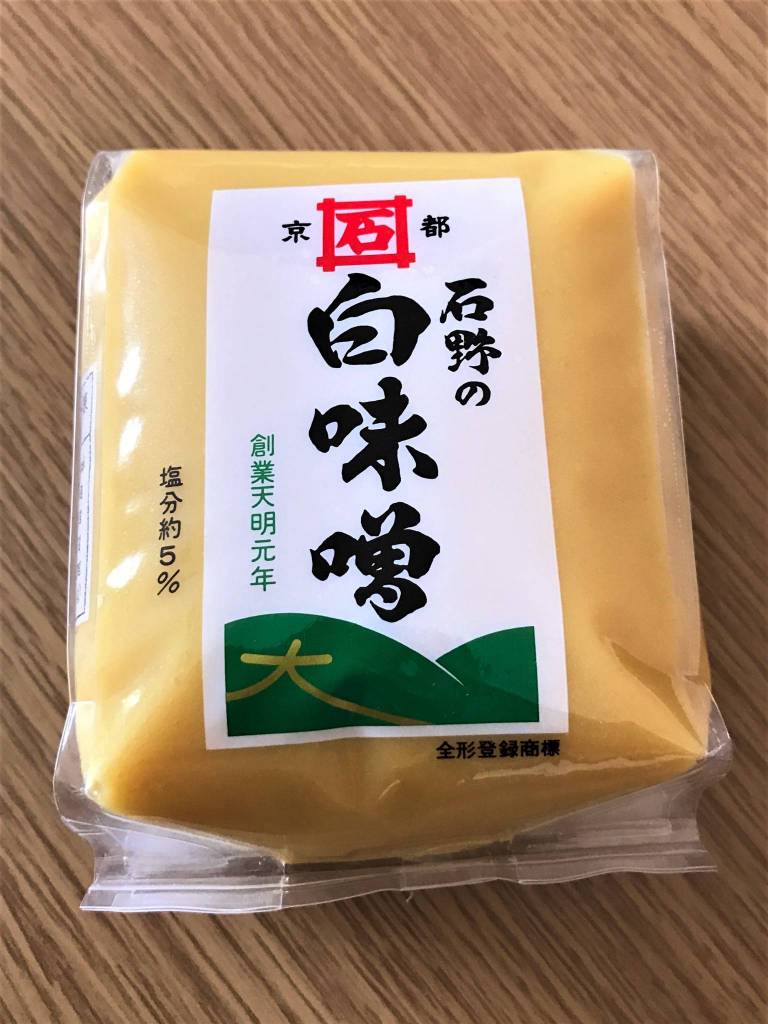
This is a White Miso paste from Ishino Miso, who have been making and selling miso paste since 1971 in the Ancient city of Kyoto. I’m going to put this into the beer.
Miso is a fermented product… so it surely ferments the beer! That’s what I thought. I wonder how it’s going to turn out.
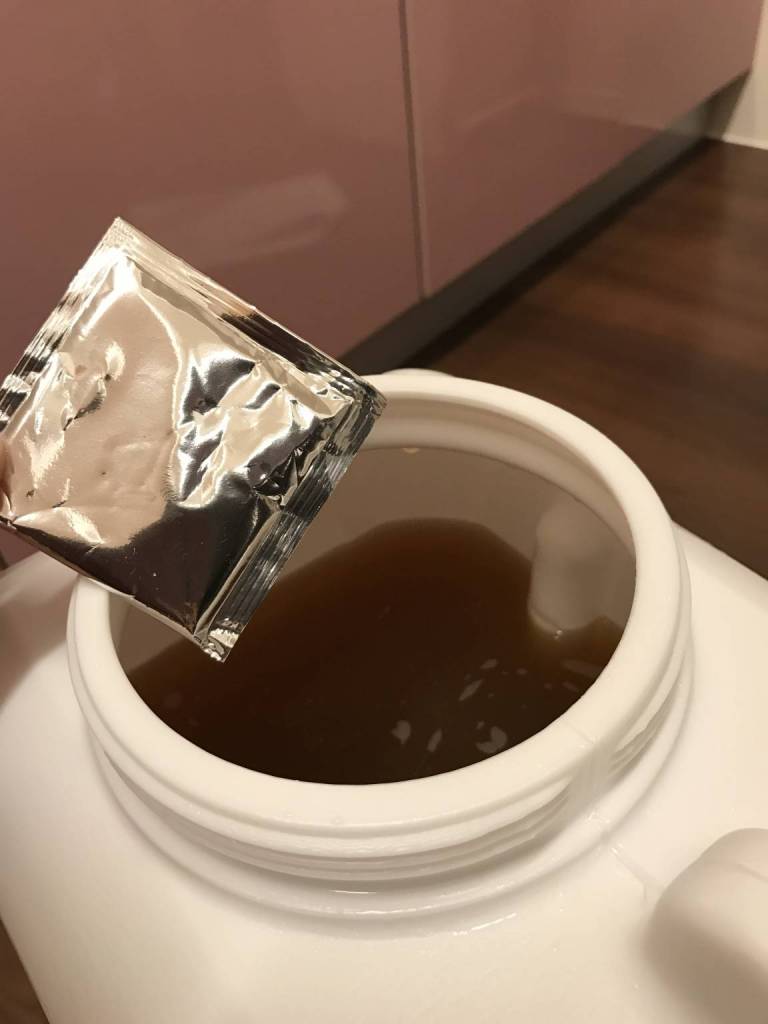
Firstly, open the beer mix can with a can opener,,, and pour it into a pot.
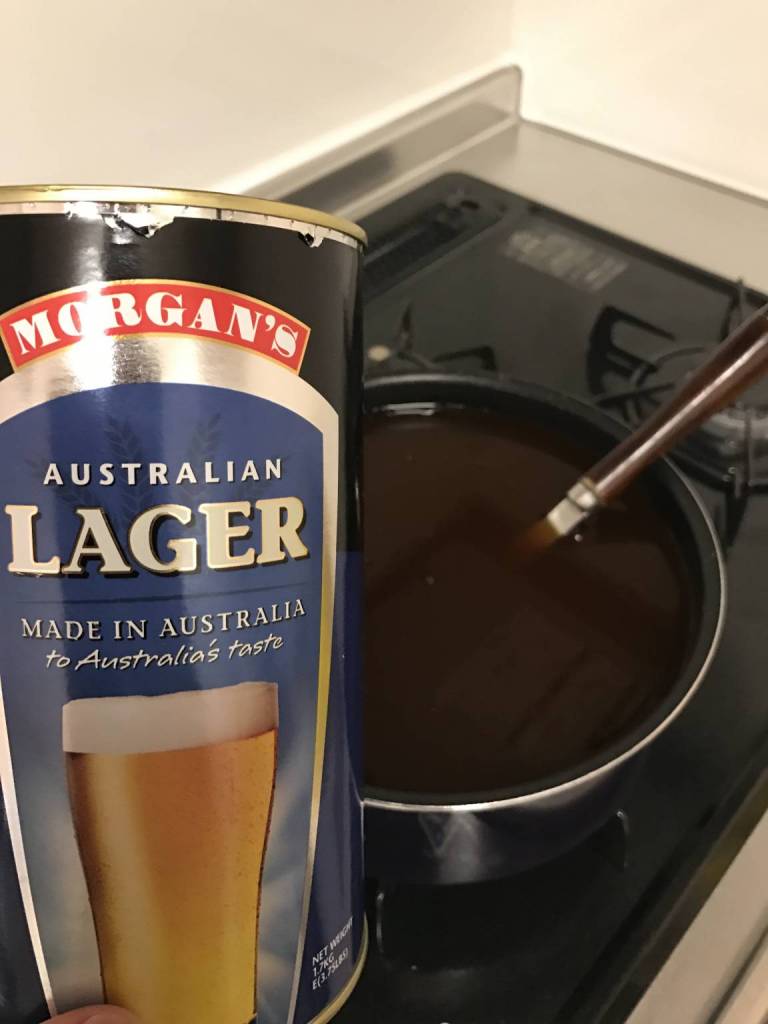
This ridiculous looking coloured liquid is the concentrate of the wheat.
It has a high consistency and it’s like a starch syrup and it is very sweet when you lick it. after the sweetness, the bitterness of the hop hits in.
You’re going to transfer this liquid into the tank, but if you don’t dissolve it in hot water, because of the high consistency and the cold temperature of winter, it will not dissolve in water.
You’d want to transfer it into the tank as isocratically as possible and insert the yeast in, so it is important to dissolve it in hot water first.
However, if you boil it in a high temperature, the smell of the hop evaporates and the beer will not have a good flavour to it so dissolve with caution.
After you’ve finished with this step, you just need to transfer it into the tank and add water as instructed.
Please take extra caution when transferring the mix into the tank. Since it is a very sweet liquid unlike the appearance, you’ll regret it so much once it goes on the floor.
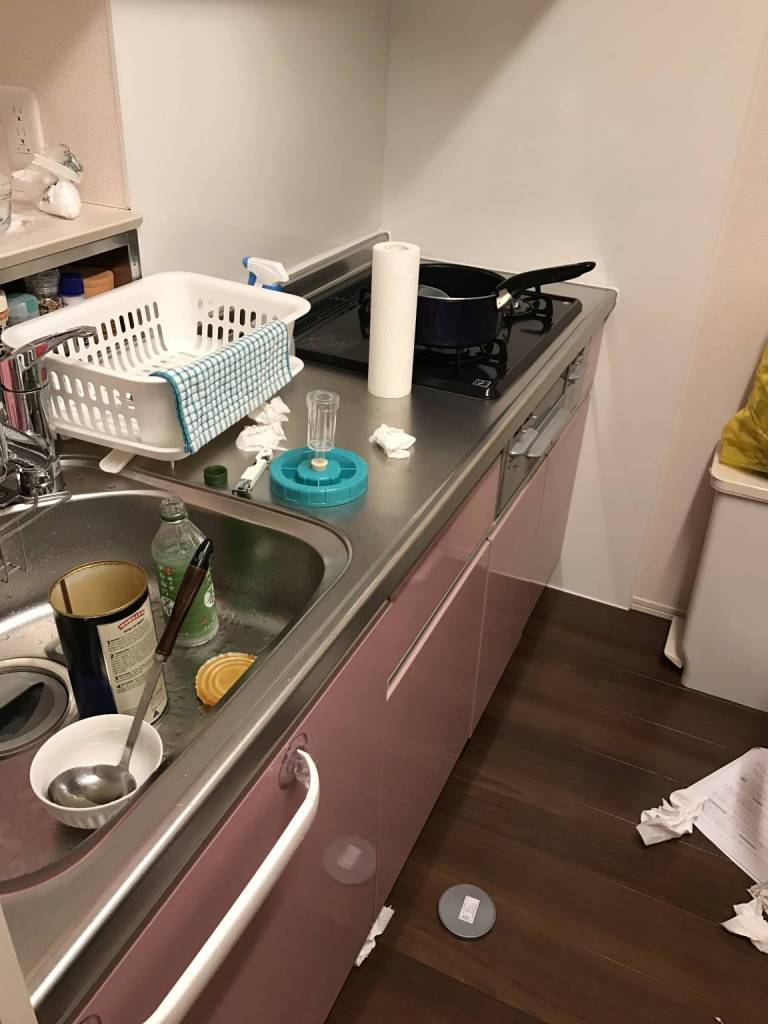
Let me say in passing that since it is my first every beer brewing, my kitchen turned out to be like this.
* To a married couple, I strongly advise that you clean as you go so your partner won’t get angry at you.
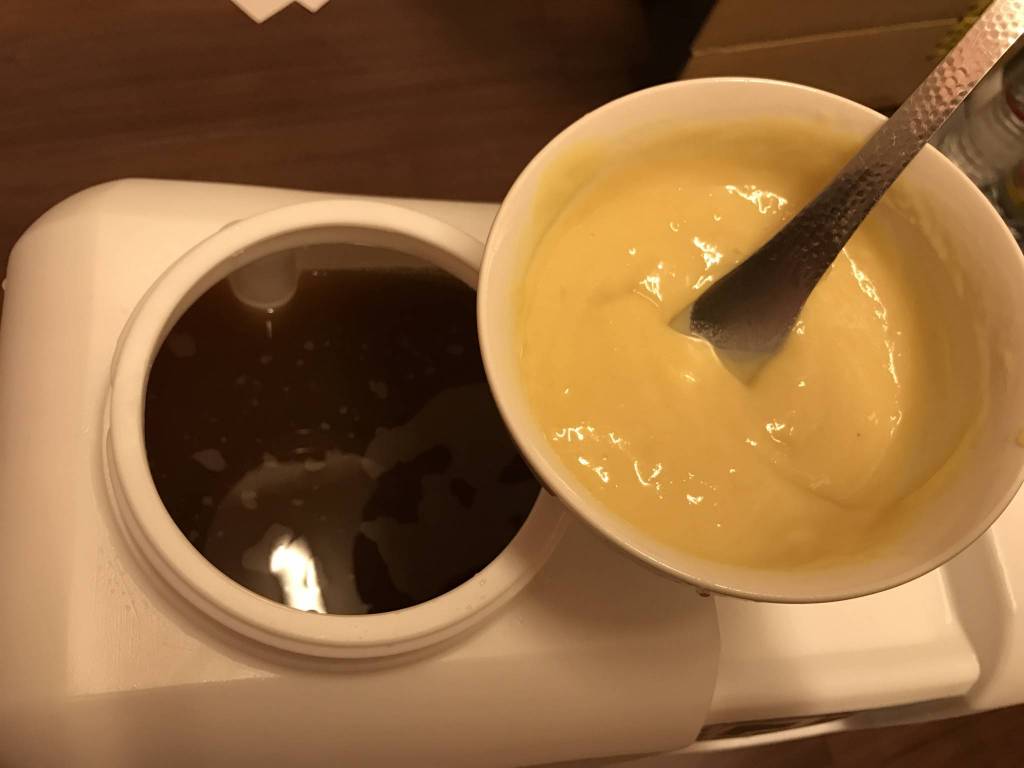
Once you’ve added the instructed water of 19L, here comes to main part. Adding the White Miso paste.
The first idea was to ferment the beer with the miso’s koji-mold (aspergillus), but just in case I’ve added the attached ale yeast.
What’s going to happen. I have no clue of how it’s going to be successful or not. I feel really bad for my friends who have to drink this, but they’ll just have to be a human sacrifice.
This is the final look. I just have to wait and pray for the yeast to do a good job now.
But rather then praying, we should create an environment where it’s a good temperature for the yeast to be active.
We just have to wait now.
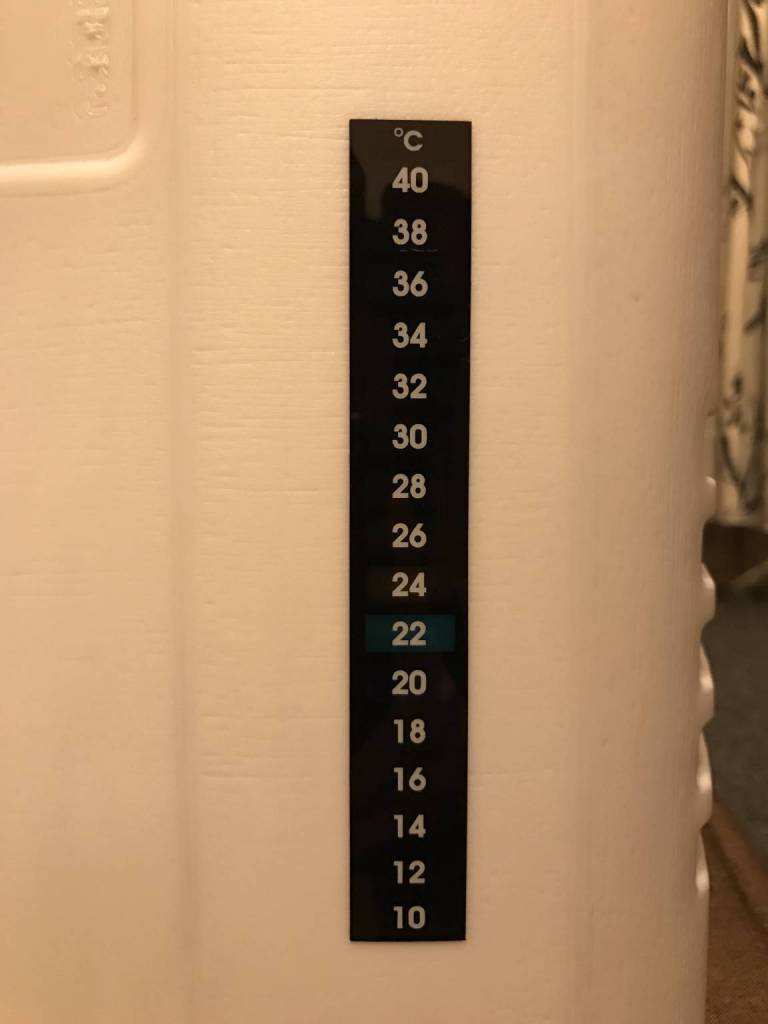
This is an attached sticker thermometer. It’s showing 22℃.
It’s not critically cold, but 26℃ is said to be the ideal temperature.
So I tried my best to bring it to 26℃. As a result…

This happened.
Then this happened.
Once the temperature goes down below 16℃, the yeast stops working and the fermentation stops.
The temperature control is a very important factor in beer brewing.
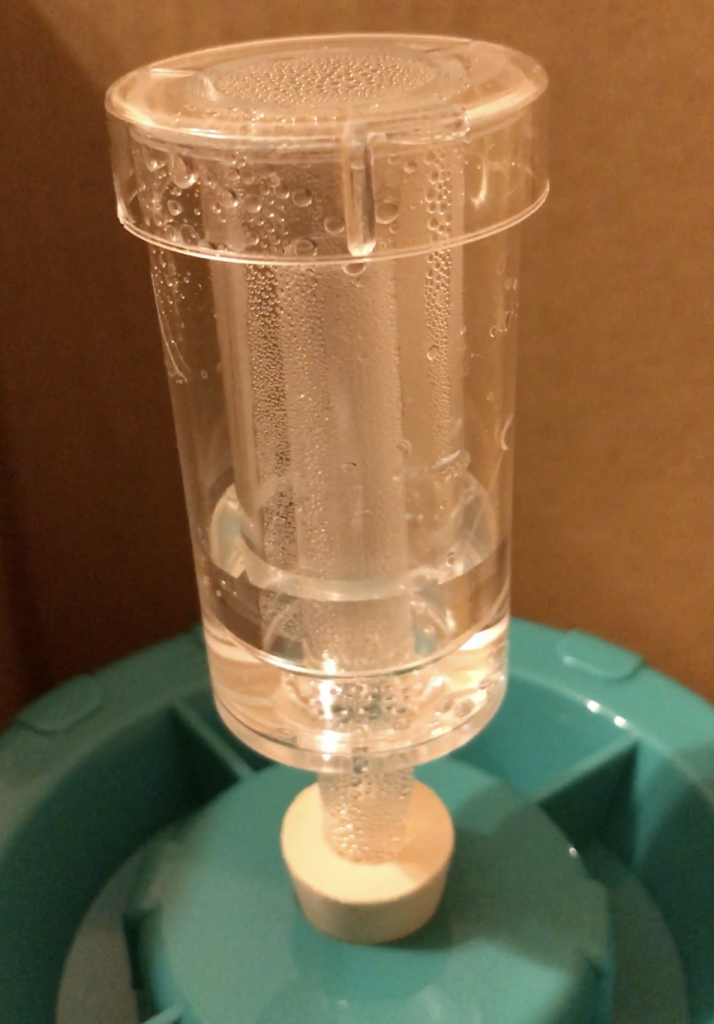
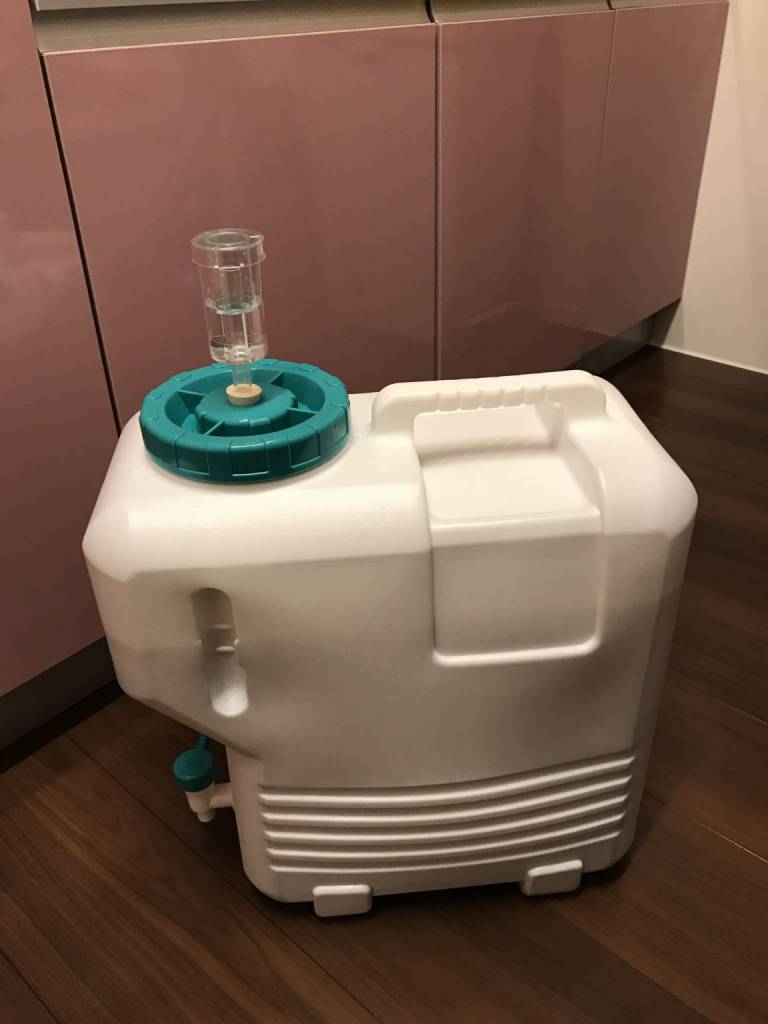
After you’ve put a lid on the tank, it is no good if liquid gets in contact with air, because it might get infected by bacteria and the brewing fails.
The equipment on top of the lid is called “Air Lock”. It allows the air inside to escape but protects from the outside air coming into the tank. the structure is very analogue and simple but it works exceptionally.
The fermentation reaction is Glucose → Alcohol + Carbon Dioxide
This reaction is occurring, and the CO2 created in this process escapes to the outside by bubbling like the video. The above photo was taken 3 days into this process.
This stage is called the primary fermentation. The fermentation period really differs on the temperature, and the type of fungi for how long it takes to turn glucose into alcohol.
It usually takes about 2 weeks for glucose to turn into alcohol, but might be because of the miso, the fermentation is quicker than usual. Since Miso is a fermented product, it consists yeast so that might be helping the process of fermentation to speed up.
Primary Fermentation ~ bottling.
発酵終了の見極めはどうするのか?
So how do you know when fermentation finished?
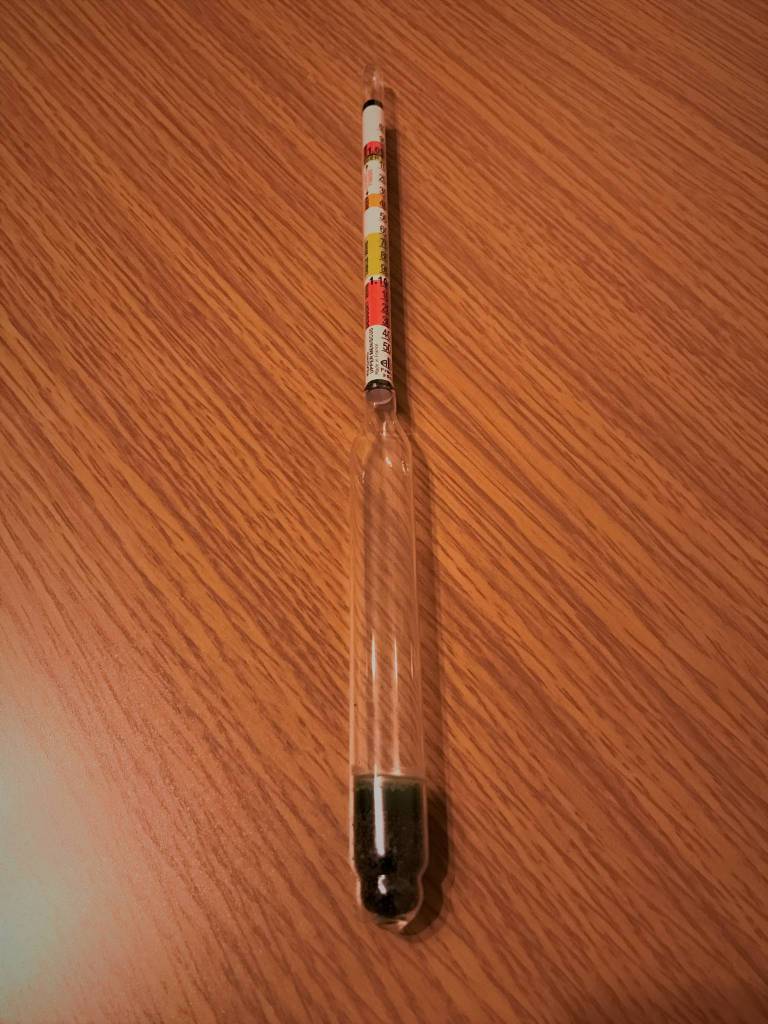
You can be crazy and taste it, but there’s a useful equipment called the Hydrometer.
Like stated above, hydrometer is used the measure the denisty of liquid, but if we go into a bit more detail, if we assume that the water density is 1.000 hydrometer is used to measure the density of the liquid measuring if it is higher or lower than the water.
By the way, hydrometer is used like this ↓
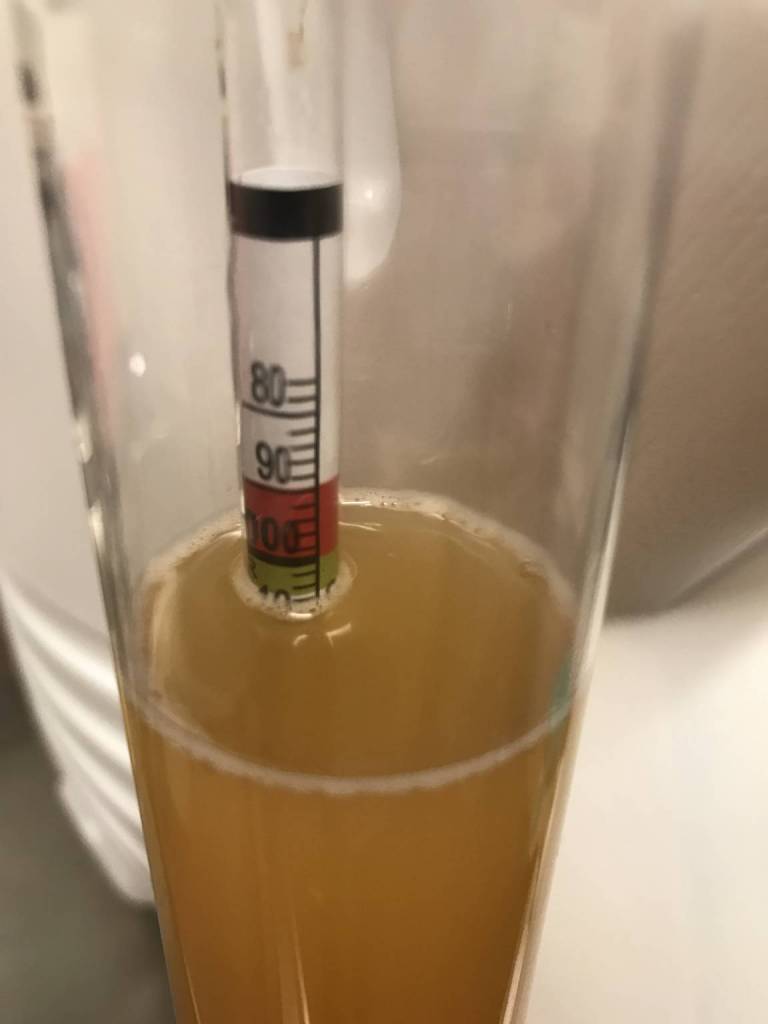
As a result, the fermentation was going well so I’m going to bottle it now.
Since I opened the lid, take a look at the beer (what will be a beer).
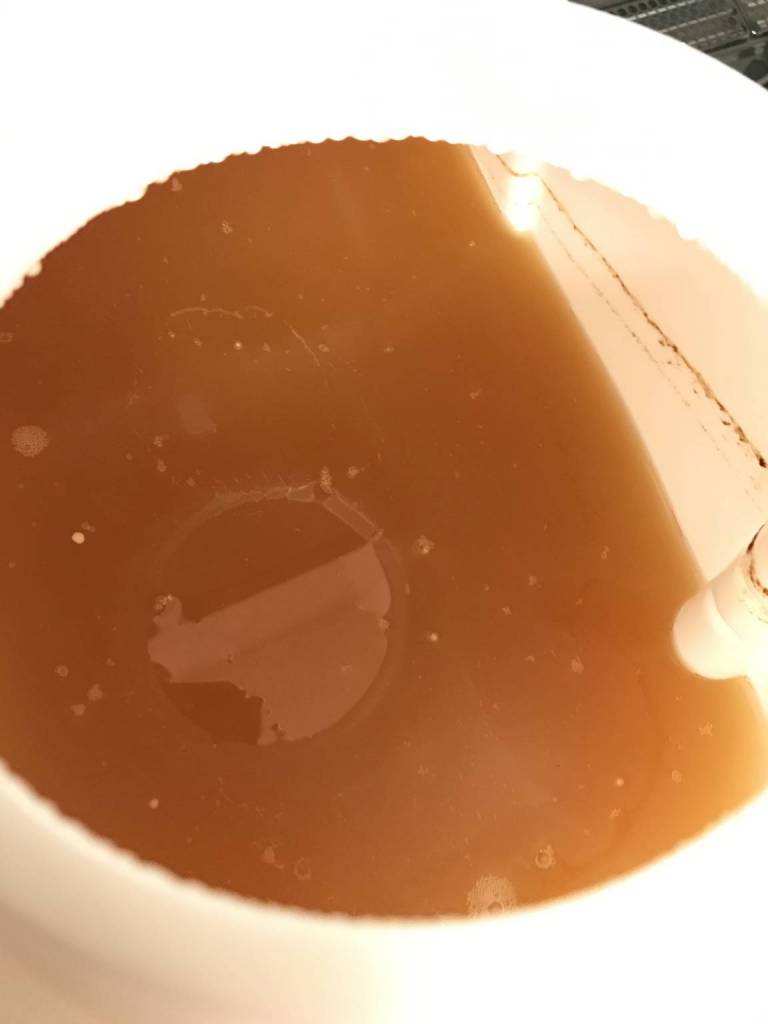
Well,,, you might be worried now since it is very different to the beer you guys know…
I was really worried too
“Is this right? Did I do it properly?”.
But nothing’s going to happened even if I was worried so I got the beer bottle ready and steady.
Tilt the tank so none of the sediments goes into the bottle.
Lets!! Pour!!
Actually, before that.
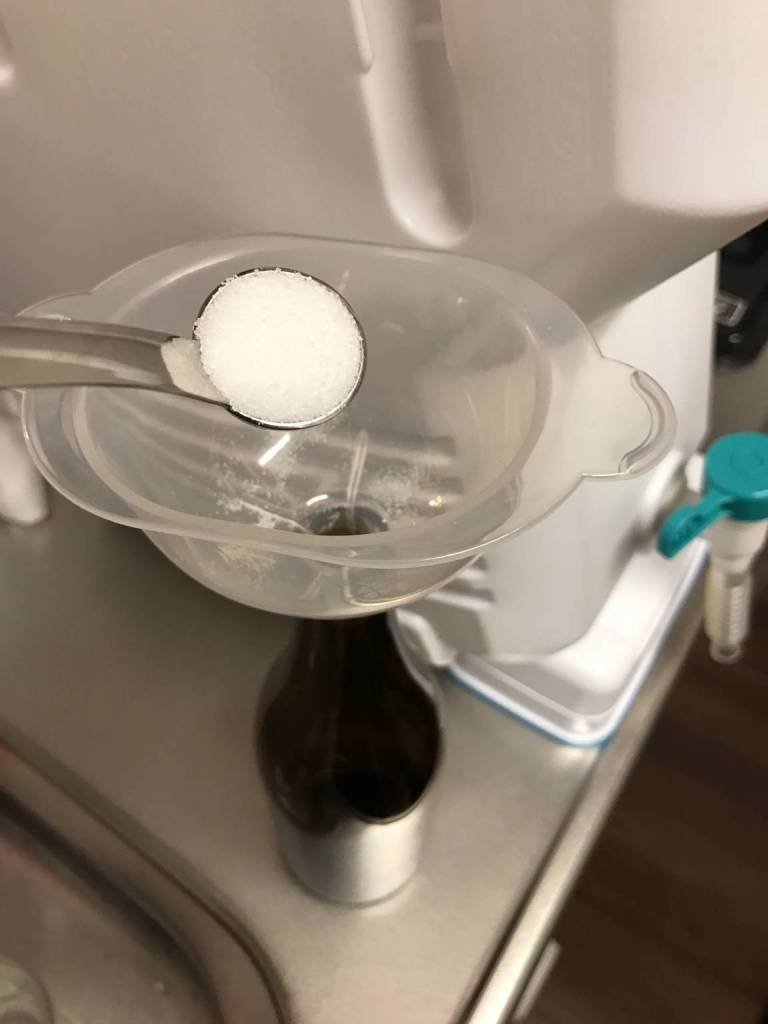
The CO2 created in the process of fermentation of the yeast has escaped so I someone how to add into this.
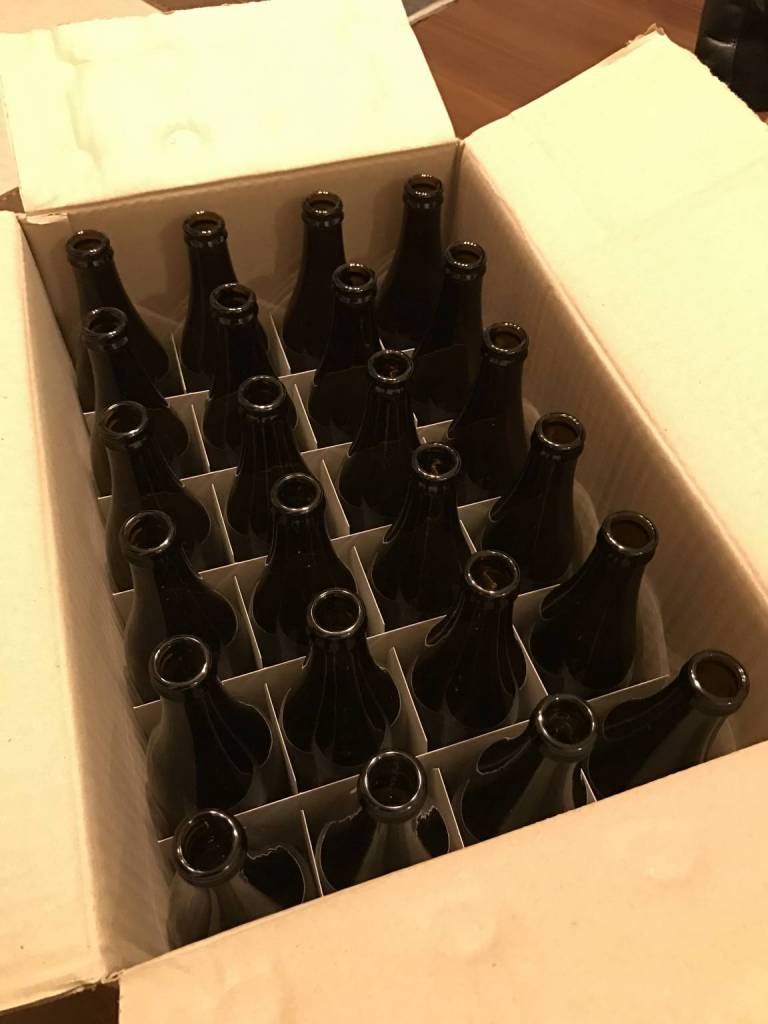
Of course, doing it from a gas bottle like the restaurants do takes up space and money, so the way to do it is the add 3g of sugar into each beer bottles.
Once you filled up the bottle with the beer liquid and put a lid on it, the yeast inside the bottle creates CO2 once again.
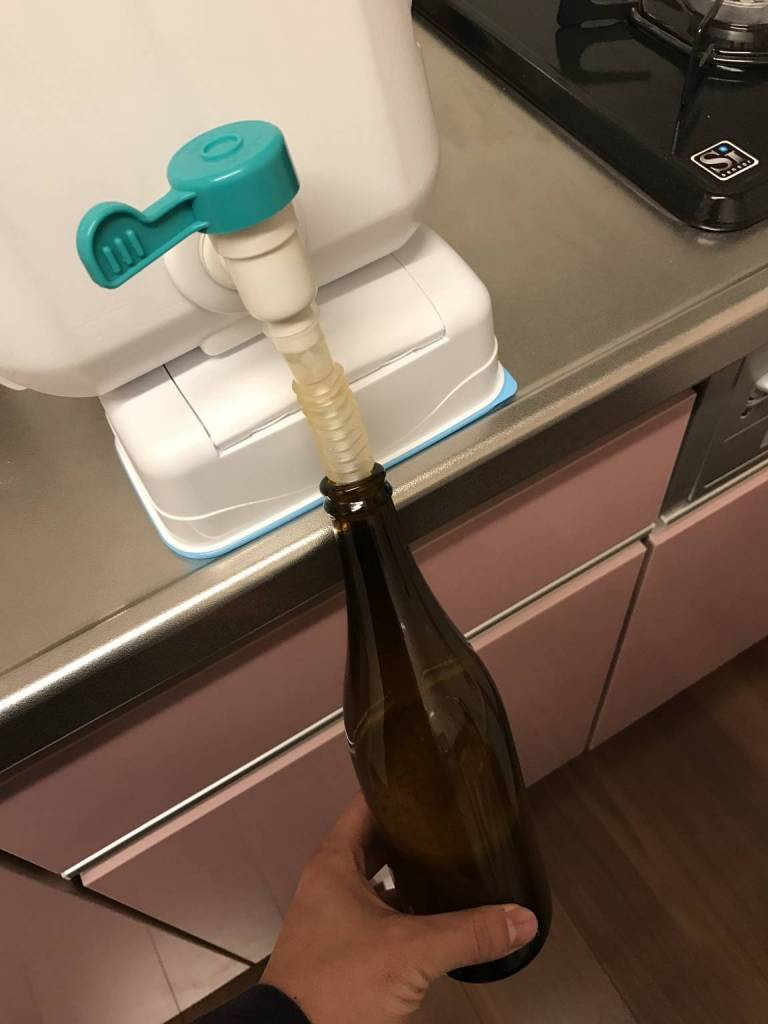
This photo is when I’m pouring the liquid into the bottle.
I’m using a tank with pouring lid, so all I have to do is this.
However, if you pour it in too quick, a convection current starts inside the tank and sediments will start flowing into the bottle.
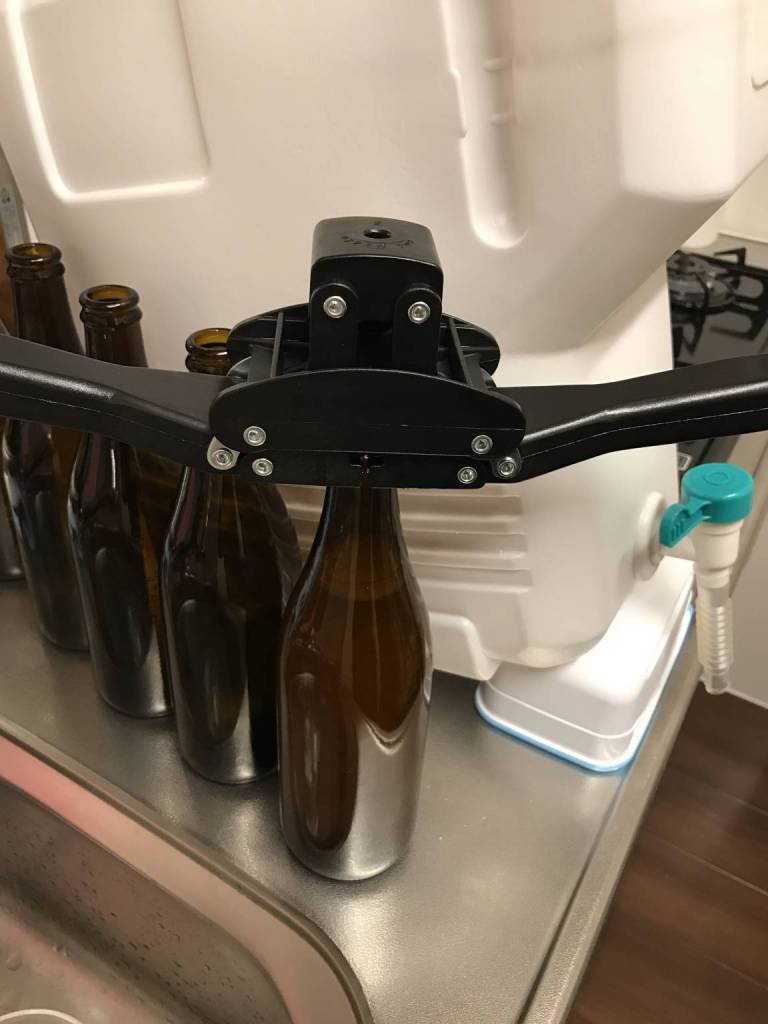
Capping.
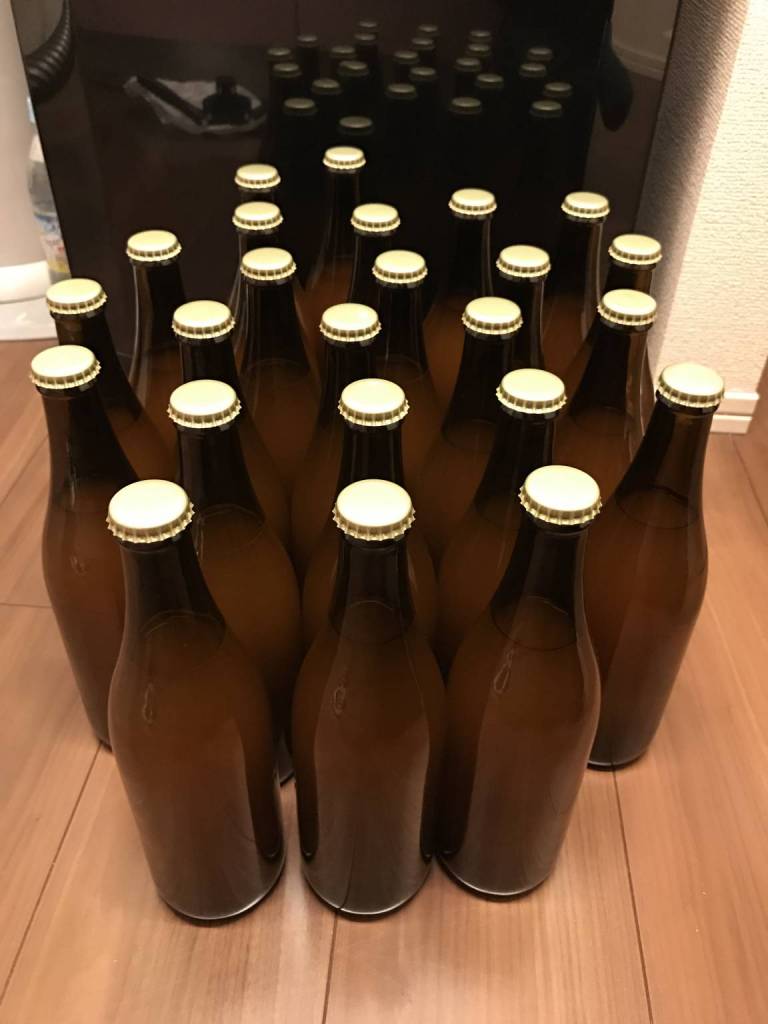
Finished. Looks amazing.
It did cost a lot to buy the actual beer brewing kit, but this one process makes 35, 36 x 500ml bottle, so it is very cost effective.
Secondary Fermentation
From now on, it’s called the secondary fermentation. Just 1 more week and we can open it!
It has only been 2 weeks since started. It’s going ridiculously quick.
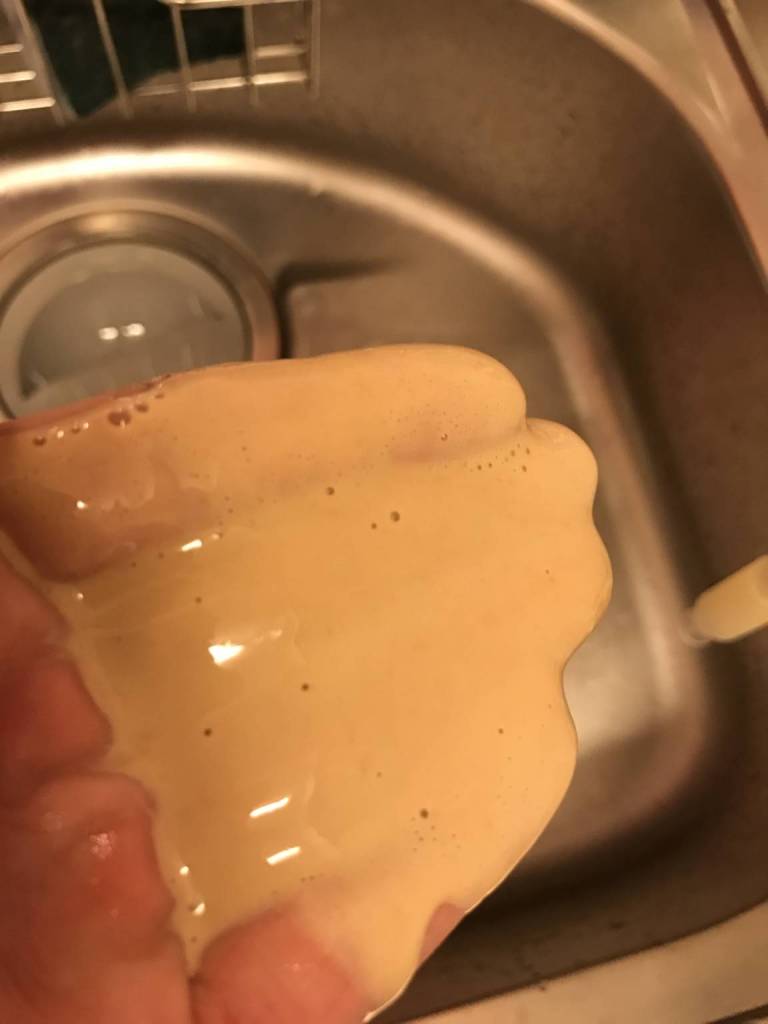
So just FYI this is the sediment. It’s the sedimentation of the yeast.
I’ve added miso paste in this time, so it feels like it’ll be good for skin care.
Apparently, this sediment is really good for your body, and some products like Ebios supplements uses these sediments.
…. Fourth Day
So it’s easier to tell, I’ve bottled one in a plastic bottle. Have a look at the before and after.
This is the before.
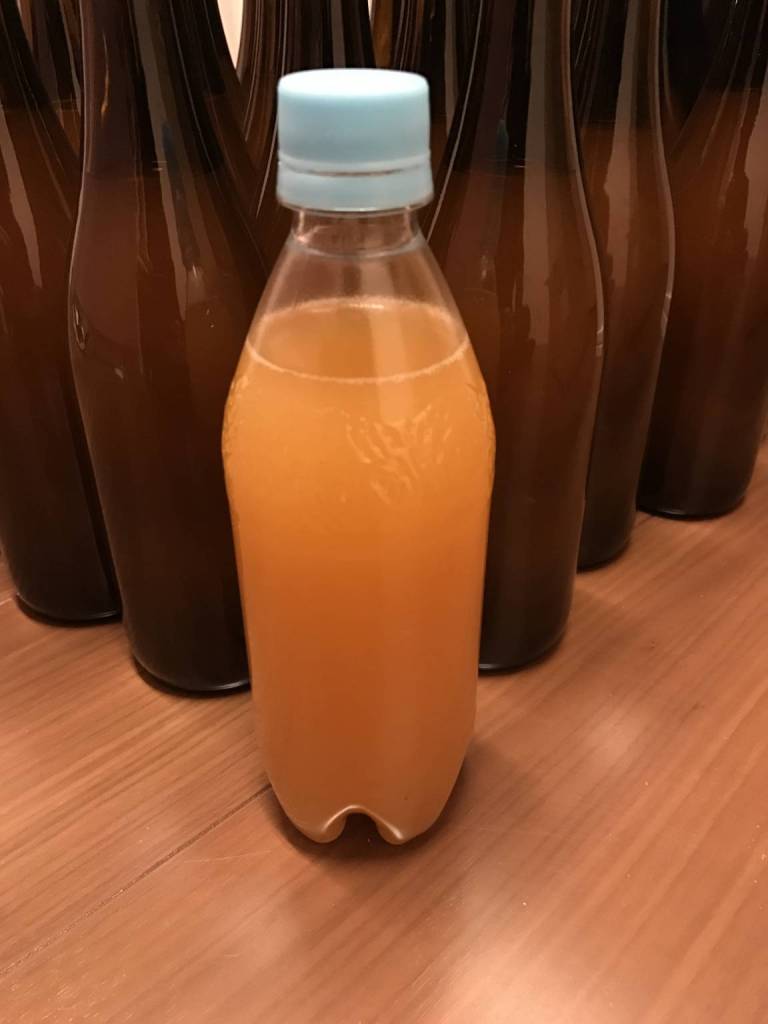
And after.

I honestly didn’t think it’ll be as clear as it is so I’m pretty stoked.
Now it goes into a fridge.
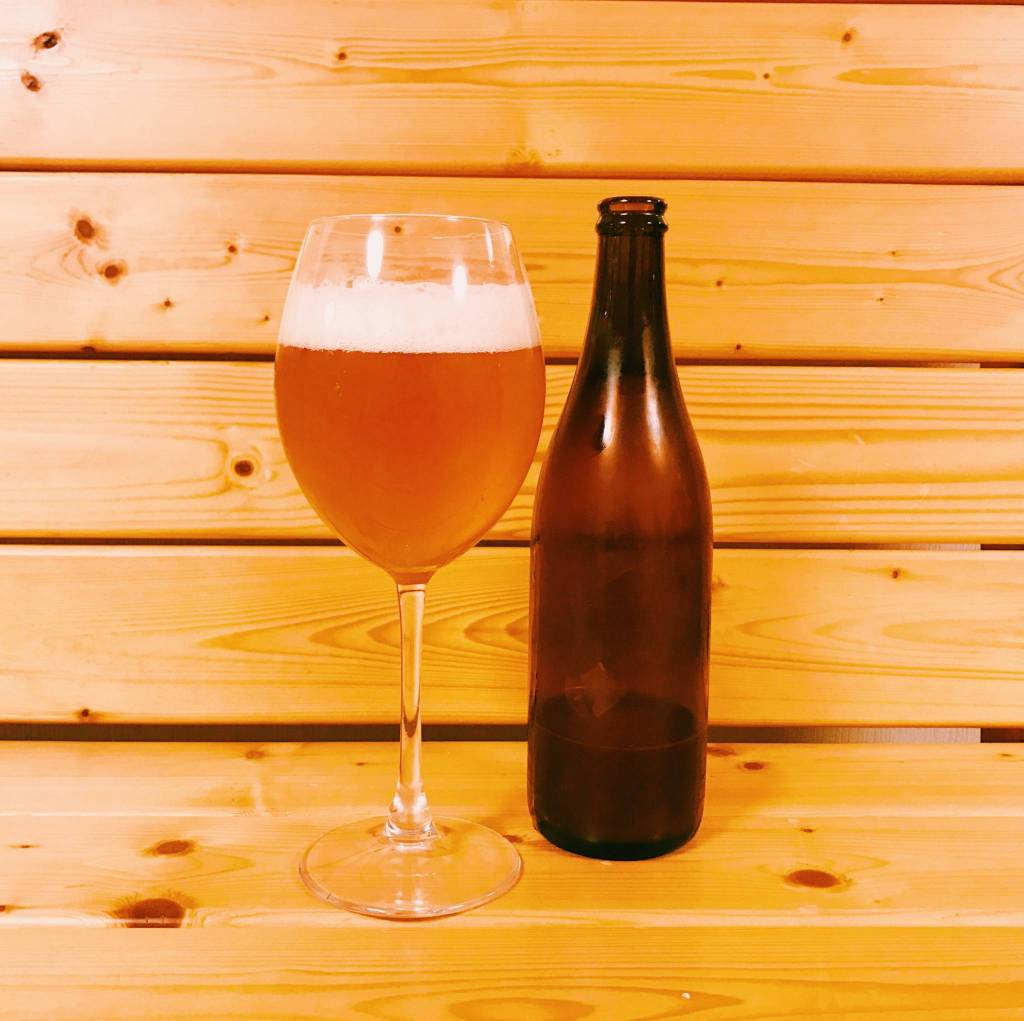
Done!!!!
I was very worried once during the process, but if this isn’t a beer, then what is?
The taste…
Wow, it’s miso flavoured. I can taste the miso.
It’s not those miso soup taste where it’s thick, but the robust taste of miso adds a rich and deep flavour to the beer.
If I use figure skating as an example, it was a reckless try like a beginner trying to jump a quadruple axel, but it turns out to be a huge success!

The very first “myd IPA” has been made.
It is so easy to make an original beer with the use of Home brewing beer kit.
The difficulty of brewing beer felt like nothing.
If you follow the instruction well, anyone can make a tasty beer.
I’d really want all the beer lovers to try it.
This is the kit I used this time.
The bottle is sold separately.
I’m going to experiment more with flavours and once that’s done, I want to open a myd Beer Pub in Kyoto. Please look forward to the second edition of Beer brewing!


No Comment